Choose your viewer type
Set your role once and we will tailor the guidance across SIP University.
The shell-up day
One panel out of order can stop the crane and reset the day. When set-out is accurate and joints are sealed as you go, the shell feels like a kit that clicks into place. UltraSIPS provides a repeatable install sequence so crews move fast without cutting corners.
Install sequence protects structure, airtightness, and finish quality.
Before you lift
The install starts on paper. Confirm layout drawings, panel numbering, and the lift sequence before the crane turns up.
Step 1: Set out the base
Confirm sole plate lines and check diagonal measurements. Dry-fit where possible to confirm panel order.

Step 2: Position the first panel
The first panel sets the line. Plumb it carefully and brace it before continuing.
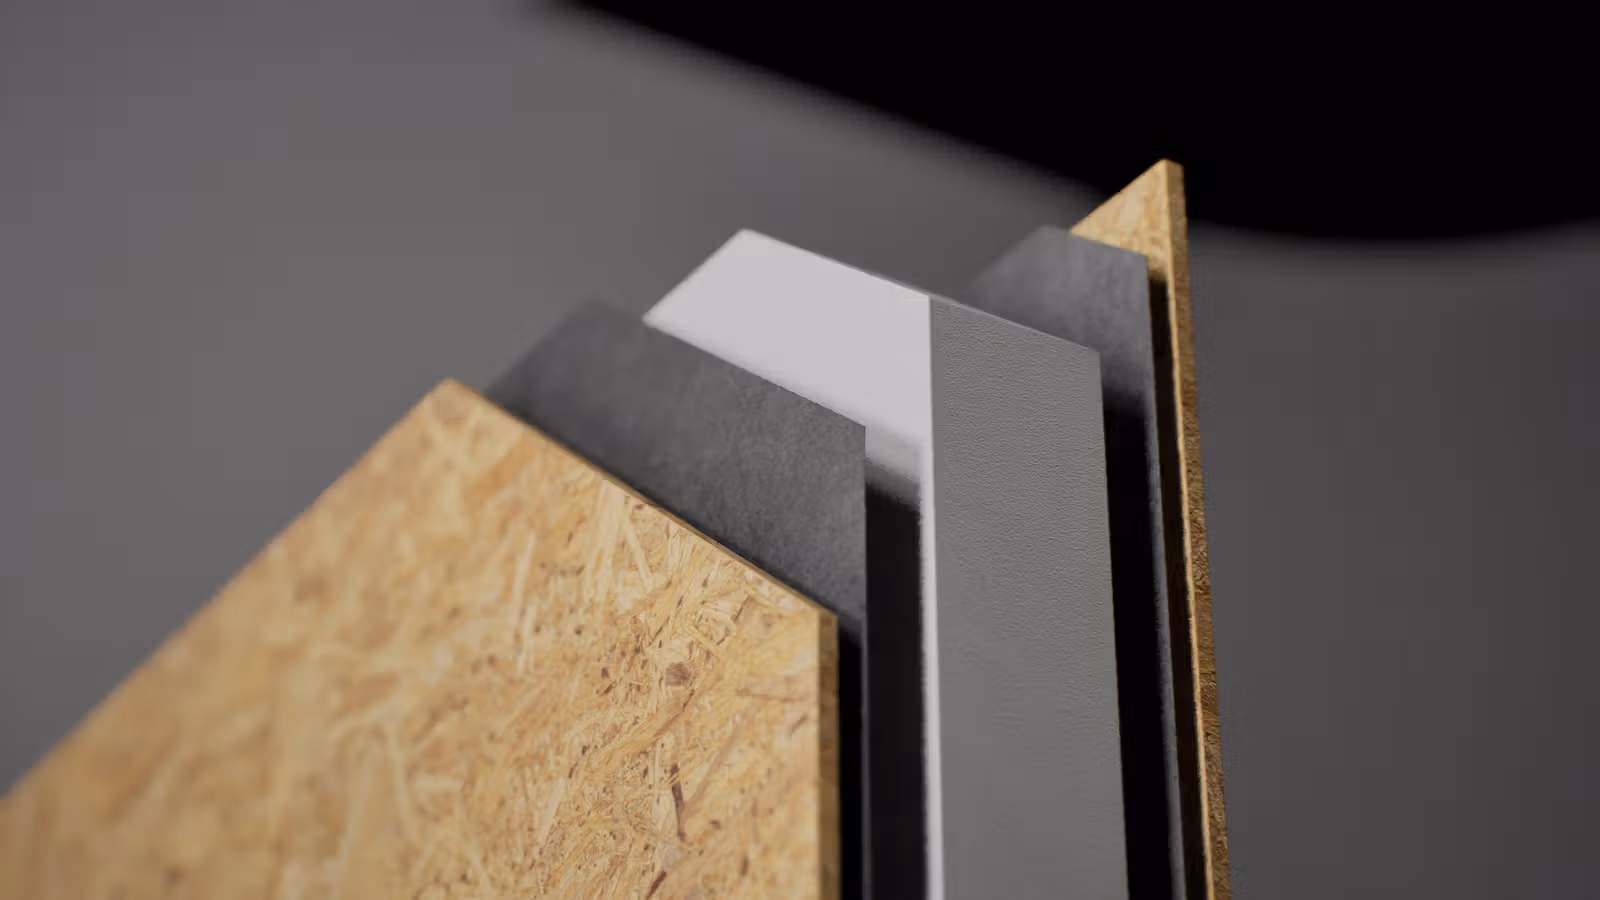
Step 3: Join panels with splines
Use the specified spline type, apply sealant, and fix per schedule.
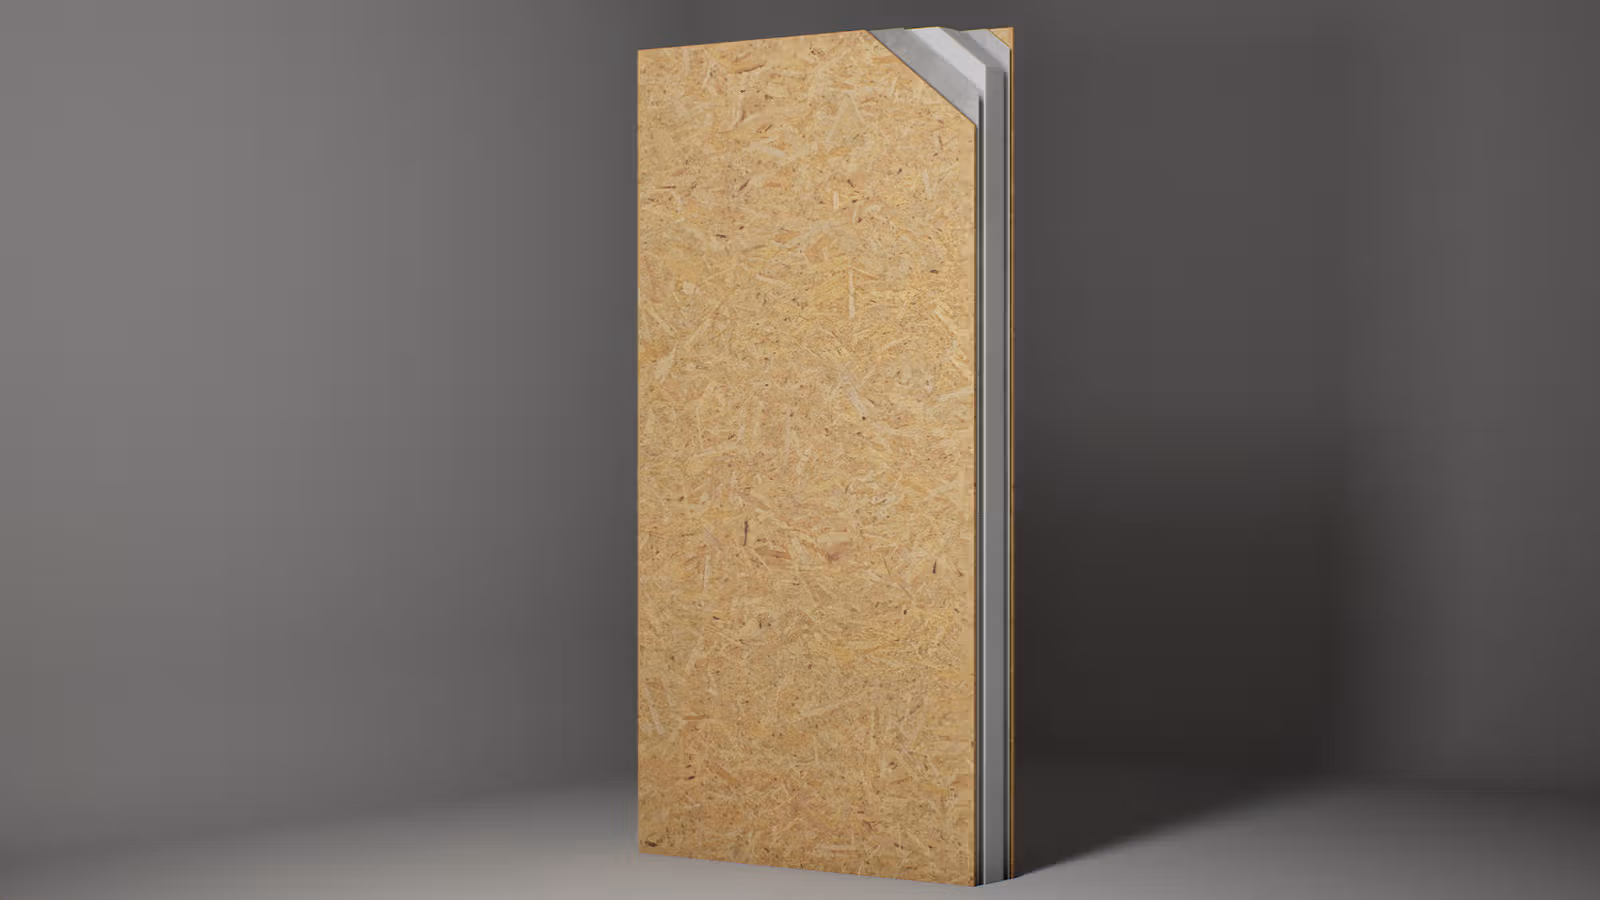
Step 4: Seal every joint
Airtightness depends on disciplined sealing. Do not skip joints, even if finishes will cover them.
Step 5: Roof panels and capping
Roof panels often go up after walls are braced. Use capping timbers and check alignment before final fixings.
Where to start
Start at a straight run with a clear corner so the install can stay square. Work from fixed reference points, not moving edges.
Floor system coordination
If you are tying SIP walls to a floor system, confirm bearing points and hangers before the wall panels arrive. Misaligned floors slow everything.
Other trades and sequencing
Keep plumbing, electrics, and glazing aligned with the SIP install. Trade clashes happen when services are not pre-planned.
Special tools that save time
- Laser level for long wall runs
- Adjustable braces and temporary props
- Sealant guns and tape rollers
When to apply SIP tape
Tape should be applied once joints are fully seated and sealed. Do not tape over wet or contaminated surfaces.
Efficiency and labeling
Panels should be staged in install order with labels visible. If labels are hidden, you will lose time and risk panel damage.
Order of construction
Wall panels first, then roof panels, then capping and final fixings. Follow the layout drawings and do not skip the bracing step.
Installation checklist
- Confirm set-out and brace the first panel.
- Install splines with sealant and fixings.
- Seal every joint as you go.
- Check plumb and square before roof panels.
- Apply tape after joints are seated.
- Confirm labels match the install sequence.