What this detail covers
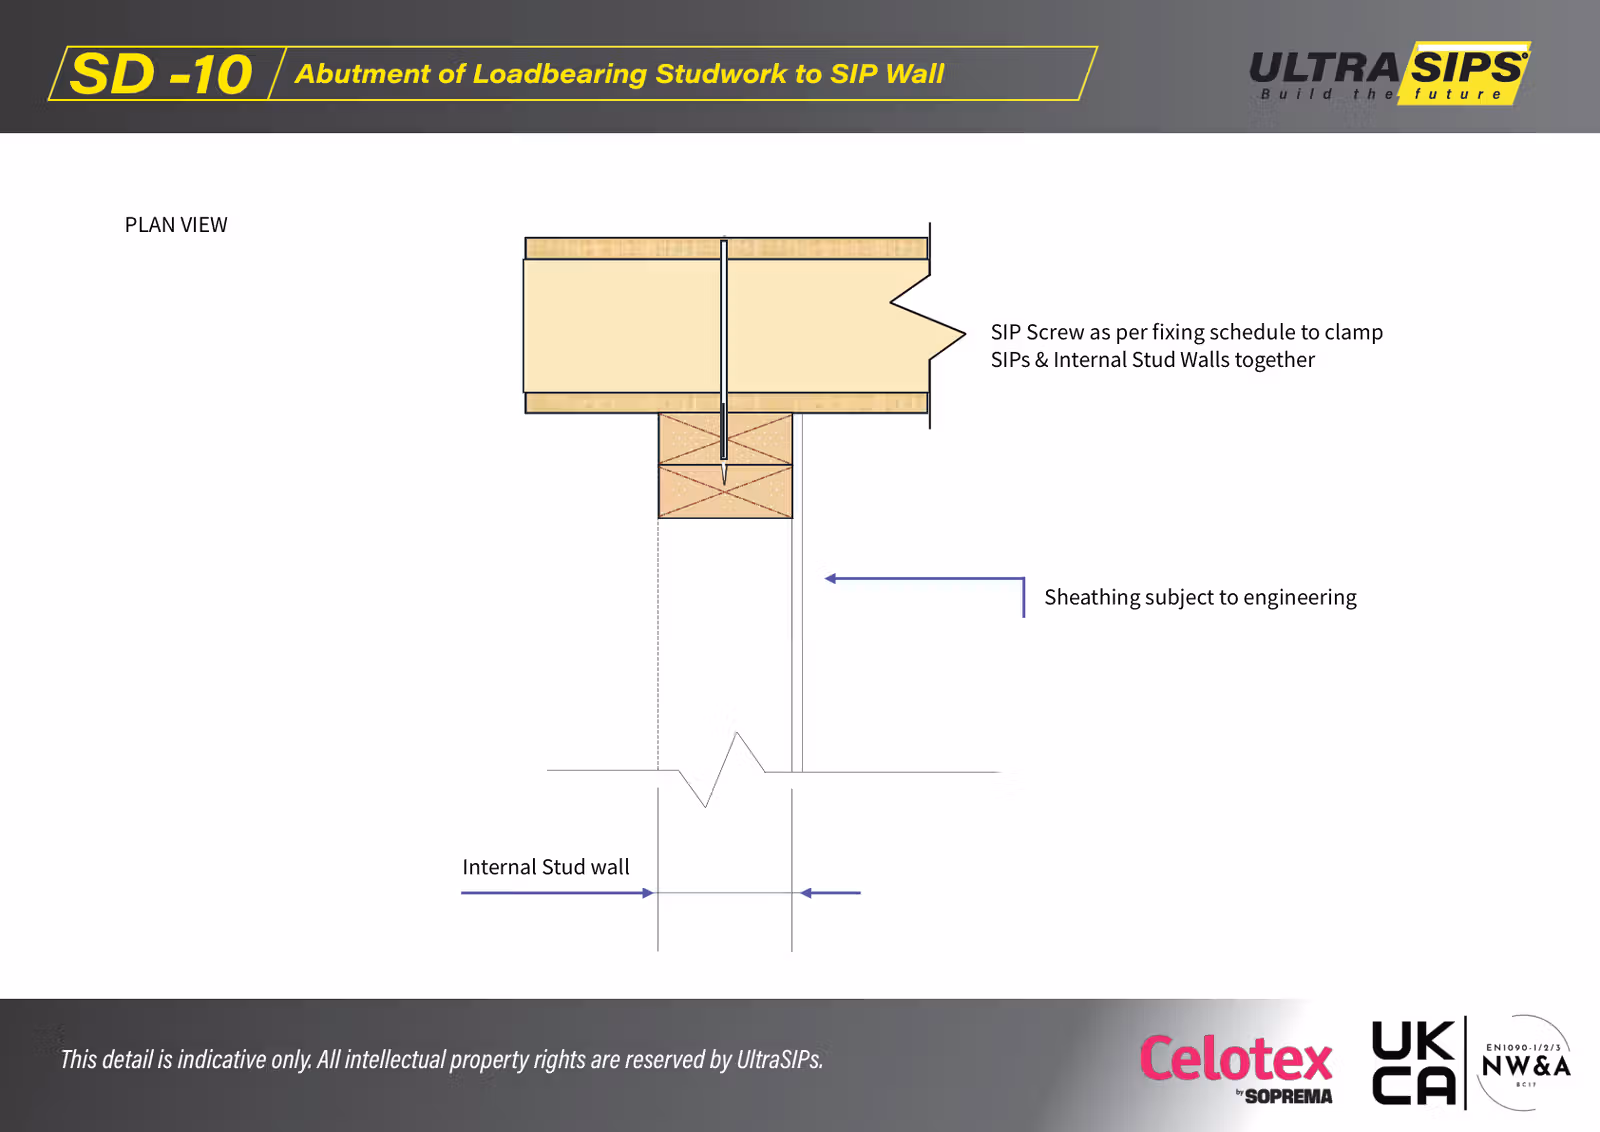
- Connecting a loadbearing stud wall to a SIP wall (plan view).
- Clamping/fastening strategy so load is transferred where intended.
Key steps
- Confirm which wall is loadbearing and the designed load path (engineer/kit drawings).
- Install sheathing/reinforcement as required (subject to engineering).
- Fix SIPs and studwork together using the specified SIP screw schedule.
Checks
- Fixings are installed into the correct timber/reinforcement zone.
- No unintended gaps between studwork and SIP wall.
Common mistakes
- Assuming “same as non-loadbearing” and under-fixing the connection.
- Missing the timber zone with fixings.
Indicative only: always follow the engineer’s fixing schedule and the project drawings.