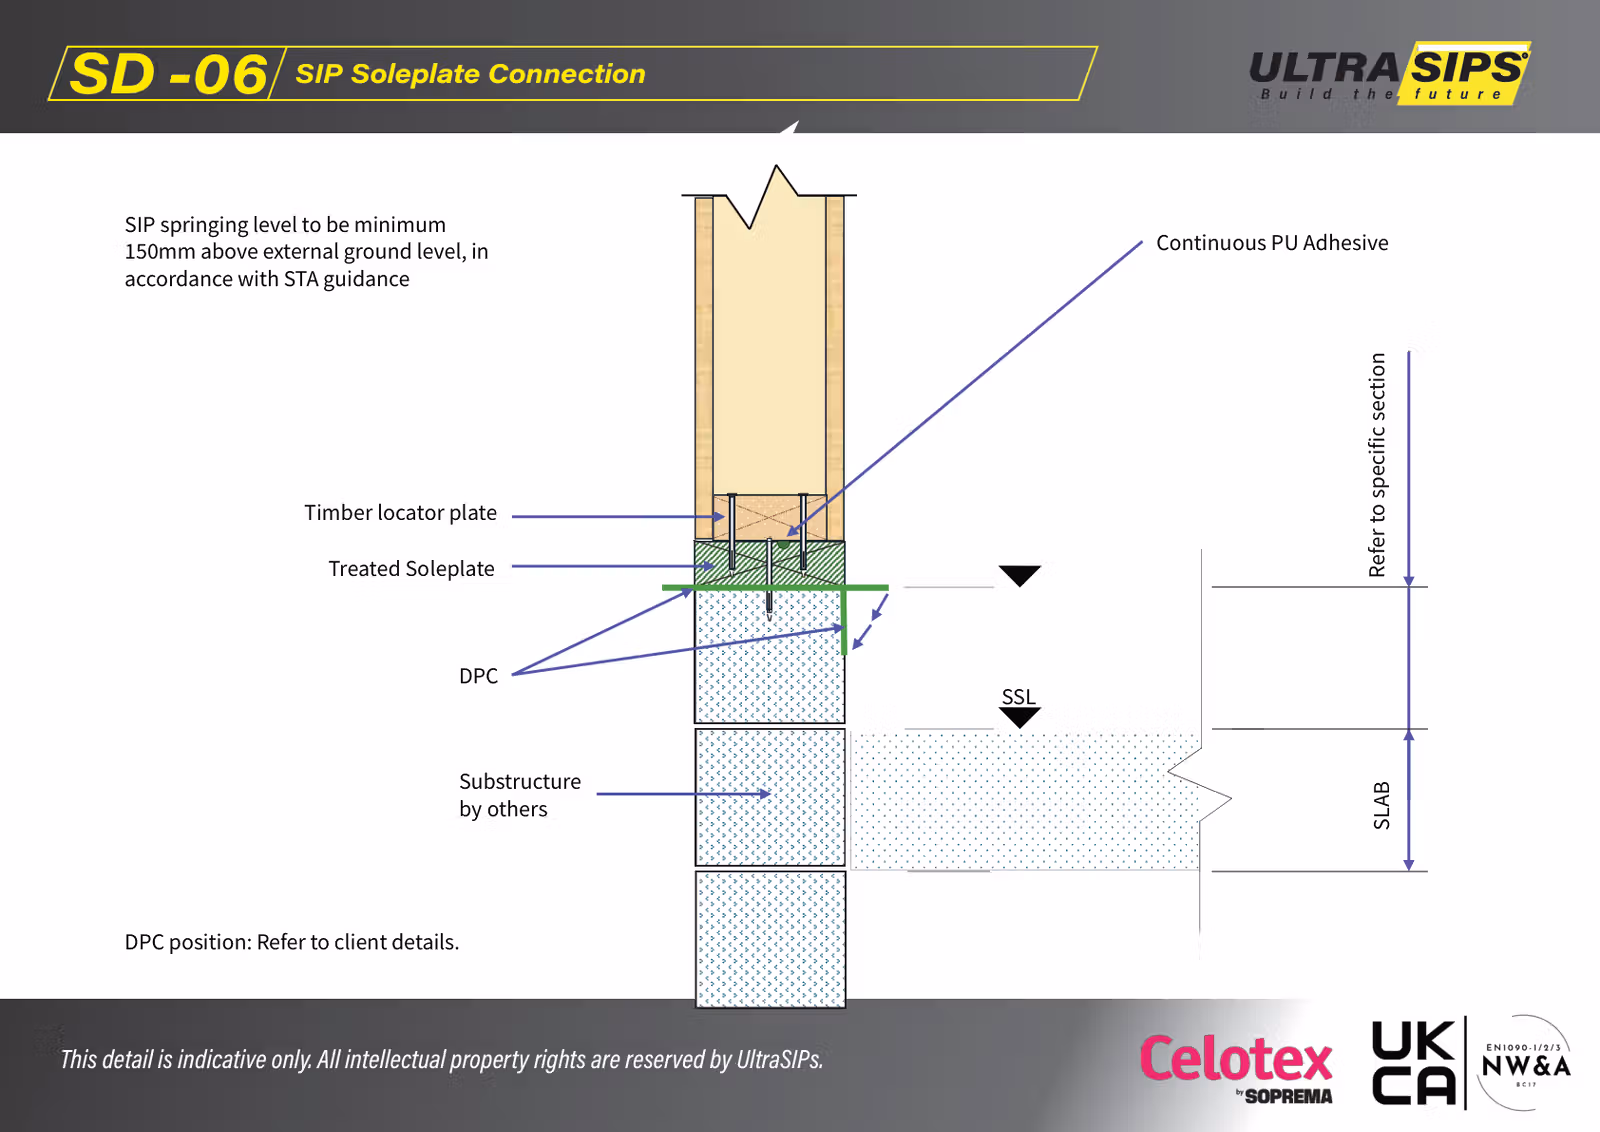
What this detail covers
- The wall-to-substructure interface: soleplate, DPC, and the SIP “start line”.
- Keeping the SIP springing level safely above external ground level (per project guidance).
Key steps
- Confirm the springing level and DPC position from the project drawings (and any client-specific section).
- Fit the treated soleplate and timber locator plate; apply continuous PU adhesive as shown.
- Fix the assembly to the specified schedule and re-check level/straightness before standing panels.
Checks
- Soleplate is straight, level, and securely fixed (this sets the whole build).
- DPC is continuous and correctly lapped to adjacent membranes.
- SIP start level meets the minimum ground clearance requirement (often 150mm+ above external ground level).
Common mistakes
- Soleplate installed out of level (problems compound through walls/roofs).
- DPC continuity broken at corners/returns.
Indicative only: always follow the engineer’s fixing schedule and the project drawings.